Hello, my lovely crochet friends!
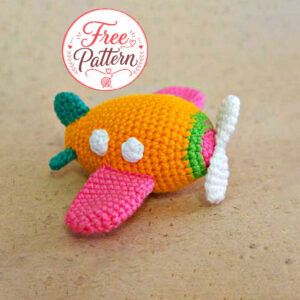
I’m so happy to be here with you today. While searching for fun, non‑amigurumi‑animal ideas, I stumbled upon this wonderful Amigurumi Airplane Free Pattern – and I knew I had to try it right away. After testing it myself, I’m excited to share it with you. Yes, we’re making a crochet airplane today!
This pattern is perfect for beginners who want to practice color changes, working in a spiral, and simple shaping. The airframe is worked in one piece with stripes of pink, green, and yellow – so you’ll get comfortable switching colors without cutting every time. Plus, the propeller, wings, windows, and tail are all made separately and sewn on, which makes the project feel like a fun puzzle.
My favorite part? The little portholes – four tiny magic rings that give the airplane so much personality. And the propeller shape is cleverly made by increasing and decreasing on both ends of a small tube.
So grab your cotton yarn in cheerful colors, your trusty hook (remember to go one size smaller than the label suggests to avoid holes!), and let’s take off on a crochet adventure!
Designer: @irina_rybolovleva
Ravelry: Irina Rybolovleva
Materials
Vita Cotton (Soft Cotton) yarn in various colors.
Filler holofaber, sintepon
Sewing needle
Abbreviations
R = row
mc = magic circle
ch = chain
sc = single crochet
hdc = half double crochet
sl st = slip stitch
inc = increase (2 sc in one st)
dec = decrease (2 sc together)
BLO = back loop only
FLO = front loop only
F.o. = finish off
(…) = repeat the instructions in brackets the given number of times
[…] = number of stitches you should have at the end of the round/row
Parts are knitted in a spiral, unless otherwise indicated.
You can knit from any yarn. The main thing is to choose the right size of the hook so as not holes could be seen through the knitted fabric. To do this, take a smaller hook, than indicated on the yarn label.
Mark the beginning of each row with a marker, pin, or string in a contrasting color.
AMIGURUMI AIRPLANE FREE PATTERN
Airframe
Pink color
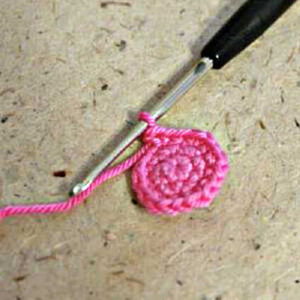
1 row 6 sc in mc
2 row (inc) * 6 (12)
3 row (1 sc, p) * 6 (18)
Change the color to green
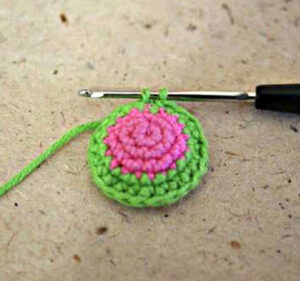
4 row (2 sc, inc) * 6 (24)
5 row 24 sc (24)
Change the color to yellow
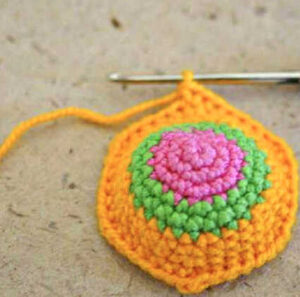
6 row (3 sc, inc) * 6 (30)
7 row 30 sb (30)
8 row (4 sc, inc) * 6 (36)
9 row – 15 row (7 rows) 36 sb (36)
16 row (4 sc, dec) * 6 (30)
17 row – 19 row (3 rows) 30 sc (30)
20 row (3 sc, dec) * 6 (24)
21 row – 23 row 24 sc (24)
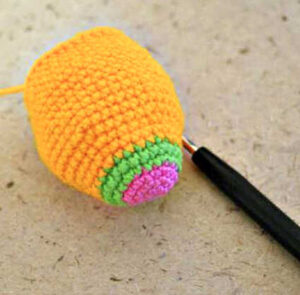
24 row (2 sc, dec) * 6 (18)
25 row – 26 row (2 row) 18 sc (18)
27 row (1 sc, dec) * 6 (12)
28 row (dec) * 6 (6)
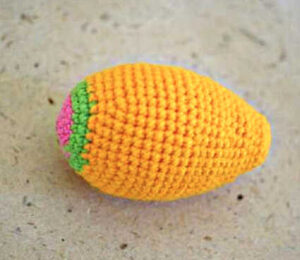
Add filler, close the remaining loops, hide the thread
Propeller
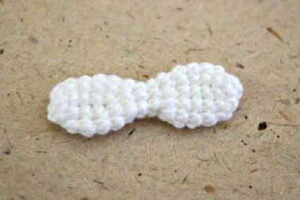
1 row 5 sc in mc
2 row (inc) * 5 (10)
3 row – 6 row (4 rows) 10 sb (10)
7 row (dec) * 5 (5)
8 row – 9 row 5 sc (5)
10 row (inc) * 5 (10)
11 row – 14 row (4 rows) 10 sb (10)
15 row (dec) * 5 (5)
Close the remaining loops, hide the thread
Portholes (windows) (4 parts)
8 sc in a mc.
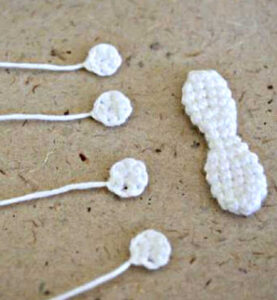
Leave a thread for sewing
Wing (2 parts)
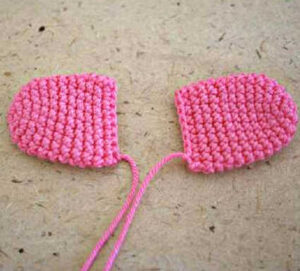
1 row 6 sc in mc
2 row (inc) * 6 (12)
3 row (1 sc, inc) * 6 (18)
4 row – 11 row (8 rows) 18 sc (18)
Leave the thread for sewing
Tail
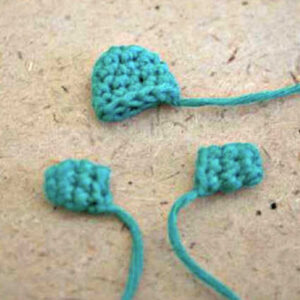
Big detail
1 row 6 sc in mc
2 row (2 sc, inc) * 2 (8)
3 row (3 sc, inc) * 2 (10)
4 row – 5 row (2 rows) 10 sb (10)
Leave the thread for sewing
2 small details
1 row 6 sc in mc
2 row – 3 row (2 rows) 6 sc (6)
Leave the thread for sewing
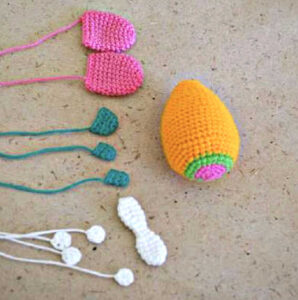
Assembly
Place the wings to the body at an equal distance from each other, sew with a secret seam. Portholes are above the wings. Try on the tail and sew it on. Propeller we place it in the center.
That’s all! Our airplane is ready to fly…
Beginner Tips
-
Use stitch markers for every round
This pattern is worked in a continuous spiral (no joining). Mark the beginning of each round with a pin or contrasting yarn – especially during the long middle section (Rounds 9–15, 36 sc each). Losing your place in a spiral can be frustrating, but a marker keeps you on track. -
Don’t overstuff the airframe
The airplane body needs to hold its shape but stay light. Add filler gradually, and stop before the sides bulge. Overstuffing will stretch your stitches and create gaps where the filling shows – exactly what we want to avoid (the pattern warns about choosing the right hook size for the same reason). -
Pin all parts before sewing
You have four windows, two wings, one tail (with two small parts and one big part), and a propeller. Lay everything on a table, arrange them on the airframe, and pin them in place first. That way you can adjust the distances (wings equal distance, windows above wings, tail centered) before committing with needle and thread.
Before you go… 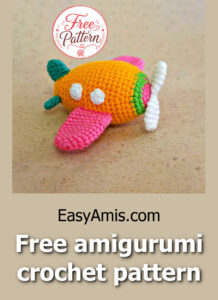
I really hope you enjoy making this little airplane – it’s such a cheerful project for a baby gift, a mobile, or just for fun. If you’d like more free amigurumi patterns, please browse my other articles – I add new designs every week.
And if you’re just starting your amigurumi journey, don’t forget to visit the “Guides” section, where I’ve collected helpful tutorials on magic rings, invisible decreases, color changes, and sewing parts neatly. Here are a few to get you started:
-
[How to Crochet a Perfect Magic Circle – Step by Step]
-
[Working in a Spiral vs. Joined Rounds: What’s the Difference?]
-
[How to Sew Amigurumi Parts So They Don’t Wiggle]
Happy crocheting, and may your airplane fly straight to your heart!
Skill level: Easy

